2020 VIRTUAL SUMMER ART PROGRAM
- text Library Director Dara Cavness 432-294-4580
LESSON INFORMATION AND INSTRUCTIONAL VIDEO LINKS BELOW INTRODUCTION TO THE SUMMER ART PROGRAM
Join Mrs. Barlow as she talks about creativity and letting that be a part of who we are. “I wanted to start our time together with this book. I know that throughout this past year and season, where we were separated for so long that maybe you’ve had some hard times with your creative flow, maybe your imagination is going dry. I want to encourage you as we begin this time of creating that you take some time to be creative -- to sit and imagine, to tinker, to sketch…” “It is important for you to get your thoughts, your imagination, and your creative ideas on to paper. We will start that this week and begin by drawing.” INSTRUCTIONAL VIDEO |
DRAWING
|
Primary Drawing Lesson
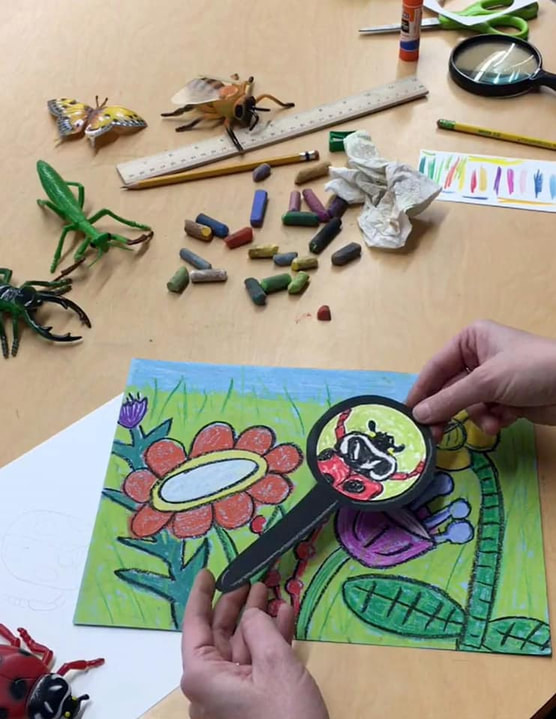
We’re going to take our imagination to a flowery meadow and look closely for bugs! Mrs. Barlow guides participants as they focus on lines, organic shapes, and details. INSTRUCTIONAL VIDEO |
|
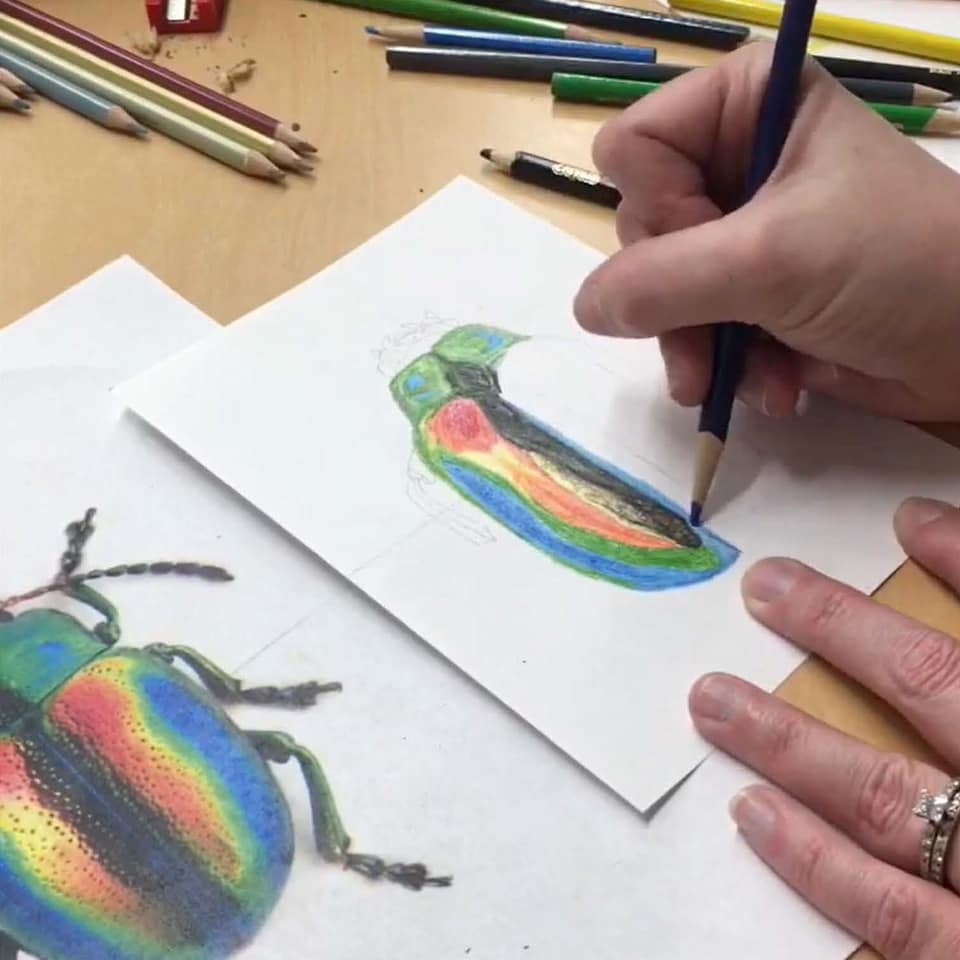
Intermediate Drawing Lesson
Beetles, beetles, beetles! Mrs. Barlow guides participants as they create symmetry with organic lines and shapes. Tips and advice from Mrs. Barlow... “Sketch light until you get it right.” “Try your best, have fun, and enjoy!” INSTRUCTIONAL VIDEO |
|
PAINTING
Introduction to Painting We begin our painting projects with an introduction that features a reading of Press Here by Herve Tullet. INSTRUCTIONAL VIDEO Color Theory In preparation for our painting lesson, follow along as Mrs. Barlow gives a lesson on color theory and how colors work together. Primary colors, secondary colors, warm colors, cool colors, complementary colors... let's paint! INSTRUCTIONAL VIDEO |
|
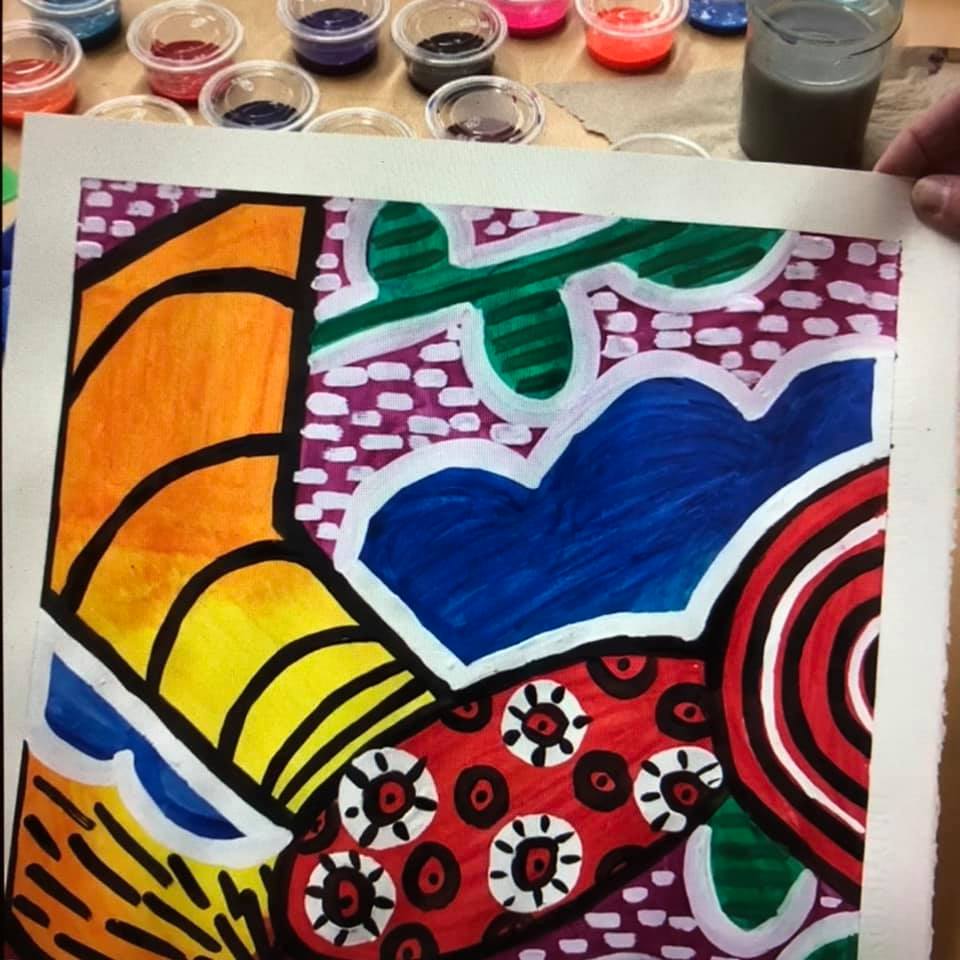
Primary Painting Lesson
Learn to use lines, shapes, and color to create a non-objective painting piece! INSTRUCTIONAL VIDEO |
|
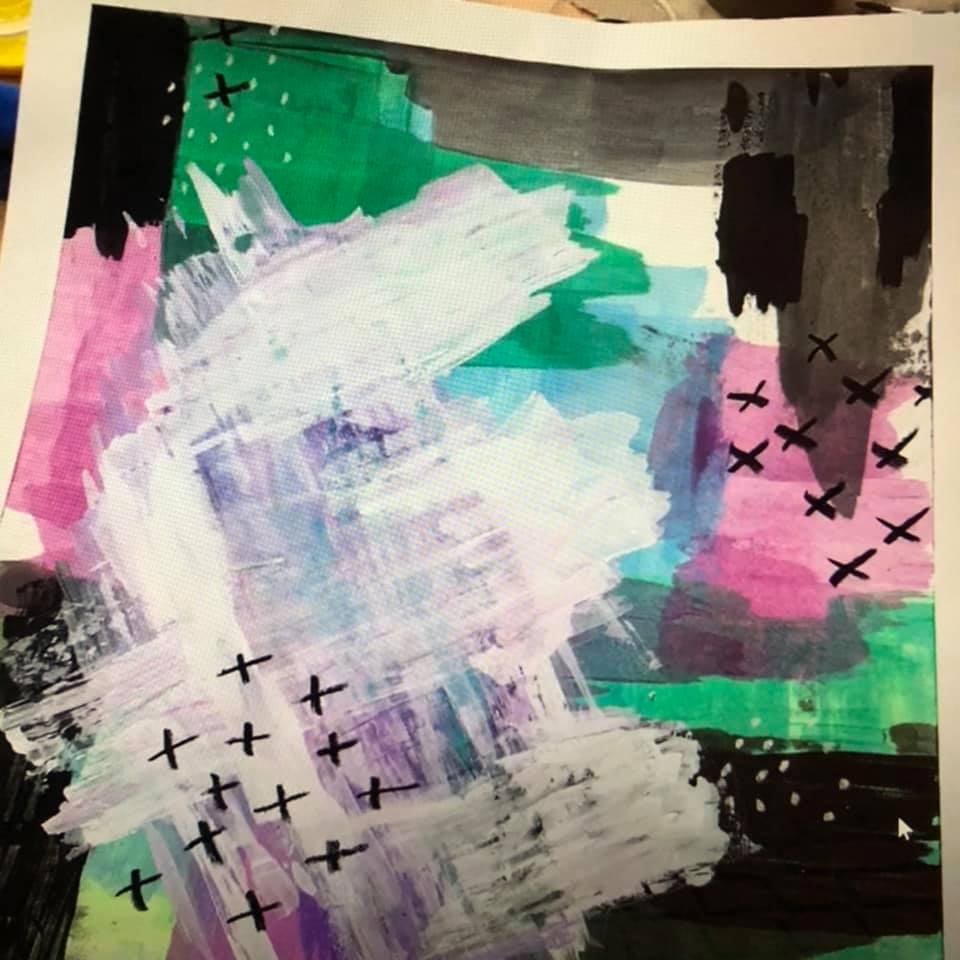
Intermediate Painting Lesson
Work with color to create a non-objective painting piece! INSTRUCTIONAL VIDEO |
WEAVING
Introduction to Weaving
Textile lessons that use color and lines to create beautiful pieces of art.
INSTRUCTIONAL VIDEO
Introduction to Weaving
Textile lessons that use color and lines to create beautiful pieces of art.
INSTRUCTIONAL VIDEO
|
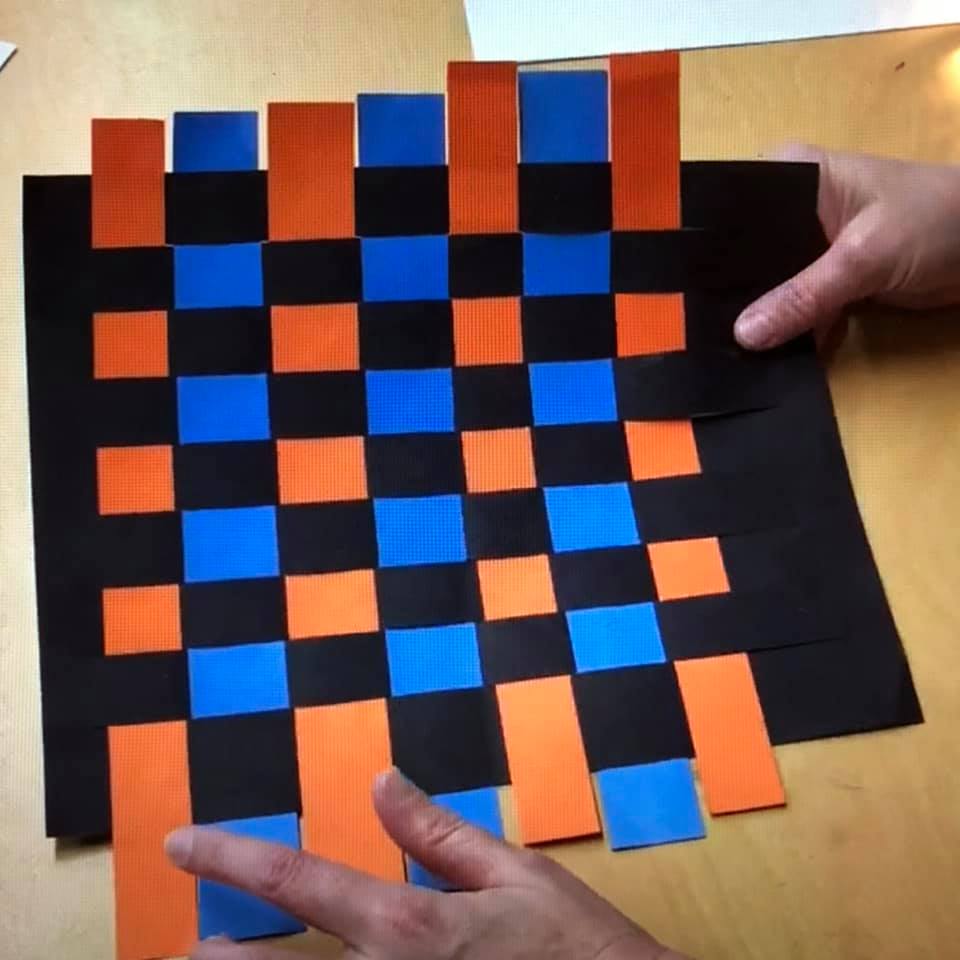
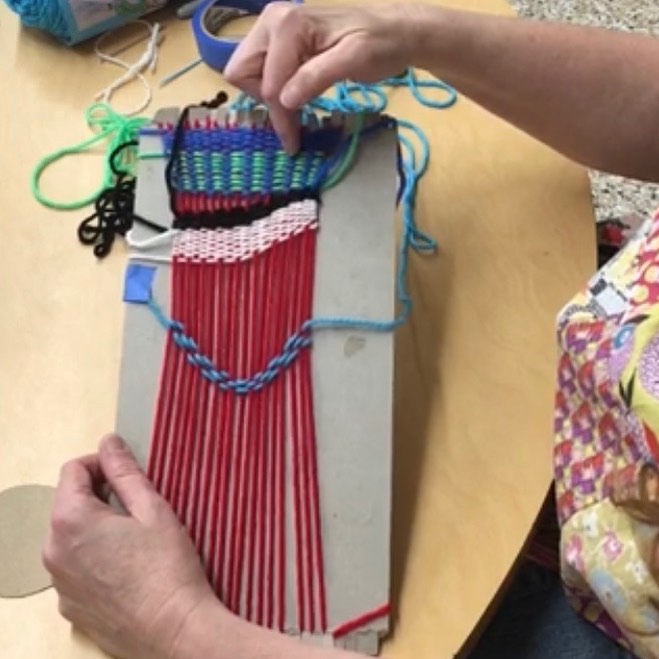
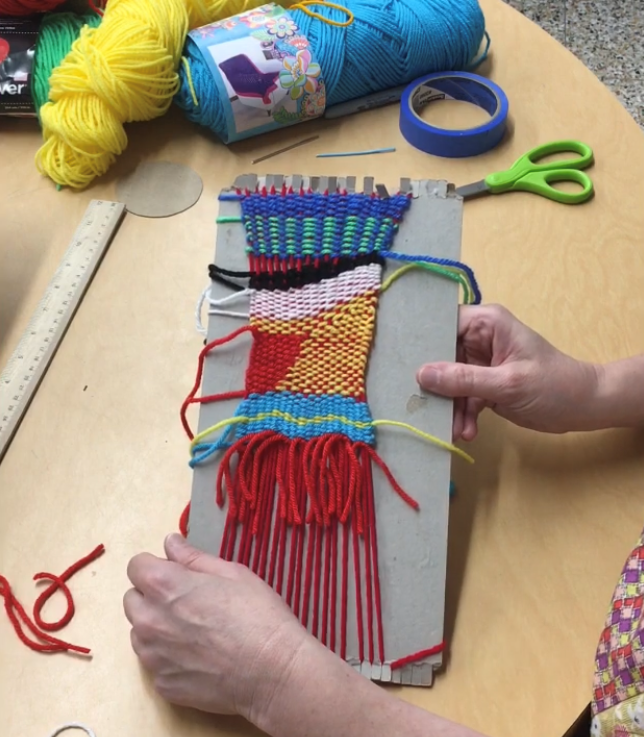
Primary Weaving Lessons: Loom Weaving
Part 1: Primary Weaving Join us as Mrs. Barlow gives an introduction to weaving with a brief history and examples from a variety of cultures around the world. Watch as she demonstrates a beginner lesson on a paper loom and explains how to sketch a plan for your weaving. INSTRUCTIONAL VIDEO Part 2: Primary Weaving Let’s start weaving! In the Primary Weaving Part 2 lesson, Mrs. Barlow demonstrates how to add the warp and weft on to your loom. You will use yarn to explore additional elements and principles of design – texture and patterns – building on to previous principles of color, lines, and shapes. INSTRUCTIONAL VIDEO Part 3: Primary Weaving We’re weaving! In the Primary Weaving Part 3 lesson, Mrs. Barlow demonstrates how to continue weaving your basic design. You will continue to use yarn to explore additional elements and principles of design – texture and patterns – building on to previous principles of color, lines, and shapes. Tune in next week for lessons that teach intricate weaving patterns and designs. INSTRUCTIONAL VIDEO Part 4: Primary Weaving We’re weaving! In the Primary Weaving Part 4 lesson, Mrs. Barlow demonstrates special weaving patterns and techniques — Egyptian knot, stripes, asymmetrical slant, circle, wave, and triangle patterns and techniques. Join us tomorrow for more intricate patterns and techniques. INSTRUCTIONAL VIDEO Part 5: Primary Weaving Intricate designs! In the Primary Weaving Part 5 lesson, Mrs. Barlow demonstrates special weaving patterns and techniques — curvy line, fringe, and chevron patterns. INSTRUCTIONAL VIDEO Part 6: Primary Weaving Finishing touches! Mrs. Barlow demonstrates how to remove the weaving from the loom by tying the warp strings to secure the weft and securing loose weft ends with the needle to the back of the weaving. Extra! Adding additional designs and details to a completed weaving and securing loose weft ends by fraying the fibers. INSTRUCTIONAL VIDEO |

|
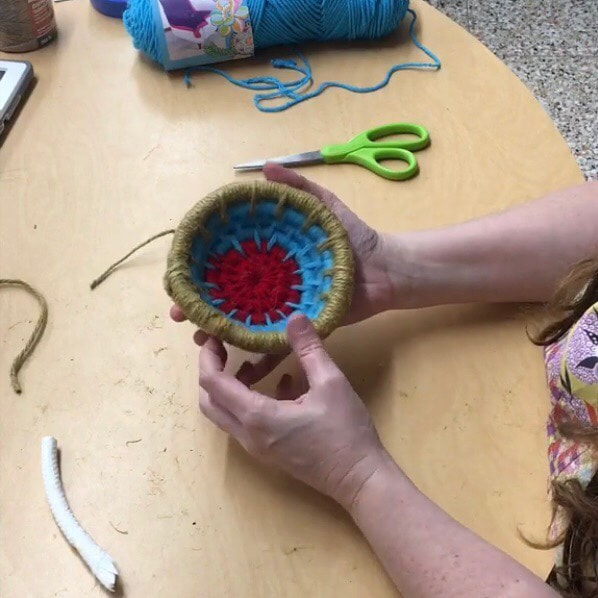
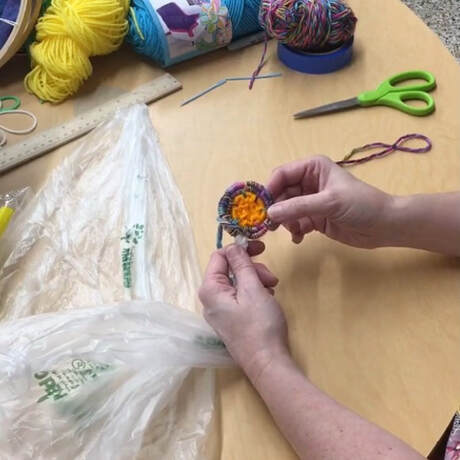
Intermediate Weaving Lessons: Coil Weaving
Part 1: Intermediate Weaving Learn to create a beautiful piece of art with cotton bundles and fibers. Join us as Mrs. Barlow gives an introduction to coil baskets with a brief history and examples from a variety of cultures around the world. Watch as she demonstrates how to sketch an idea for your coil basket focusing on design, fibers, colors, texture, and patterns. INSTRUCTIONAL VIDEO Part 2: Intermediate Weaving Let’s start weaving! In the Intermediate Weaving Part 2 lesson, Mrs. Barlow demonstrates how wrap the fiber bundle and begin the base of your coil weaving. The lesson explores additional elements and principle of design – texture and pattern – building on to previous principles of color, lines, and shapes. INSTRUCTIONAL VIDEO Part 3: Intermediate Weaving We’re weaving! In the Intermediate Weaving Part 3 lesson, Mrs. Barlow demonstrates how to finish the base of your coil weaving, start the wall, and continue building the wall based on the color and pattern of your design. The lesson continues to explore additional elements and principle of design – texture and pattern – building on to previous principles of color, lines, and shapes.*** The base is the most difficult part of the coil weaving. If you are having difficulty starting your base, ask a loved one for help or reach out to us for additional assistance. INSTRUCTIONAL VIDEO Part 4: Intermediate Weaving We’re weaving! Have you found your rhythm yet? In the Intermediate Weaving Part 4 lesson, Mrs. Barlow demonstrates how to add a handle to your coil weaving and how to finish your coil weaving by securing your fiber bundle and yarn. INSTRUCTIONAL VIDEO Bonus Part 1: Intermediate Weaving We’re weaving! In this Intermediate Weaving BONUS lesson, Mrs. Barlow demonstrates how to make a fiber bundle by recycling and repurposing household materials such a plastic bags. INSTRUCTIONAL VIDEO Bonus Part 2: Intermediate Weaving Reuse, Reduce, and Recycle! In the Intermediate Weaving BONUS Part 2 lesson, Mrs. Barlow demonstrates how to recycle household items to make a fiber bundle and join the items together to form a coil weaving. INSTRUCTIONAL VIDEO |
Conclusion to Weaving
Mrs. Barlow wraps up the weaving sessions with a message encouraging participants to keep creating and to try different patterns, designs, and ideas.
INSTRUCTIONAL VIDEO
Mrs. Barlow wraps up the weaving sessions with a message encouraging participants to keep creating and to try different patterns, designs, and ideas.
INSTRUCTIONAL VIDEO
WATERCOLOR
Introduction to Watercolor
Explore with semi-moist paints and water to add color to your drawings.
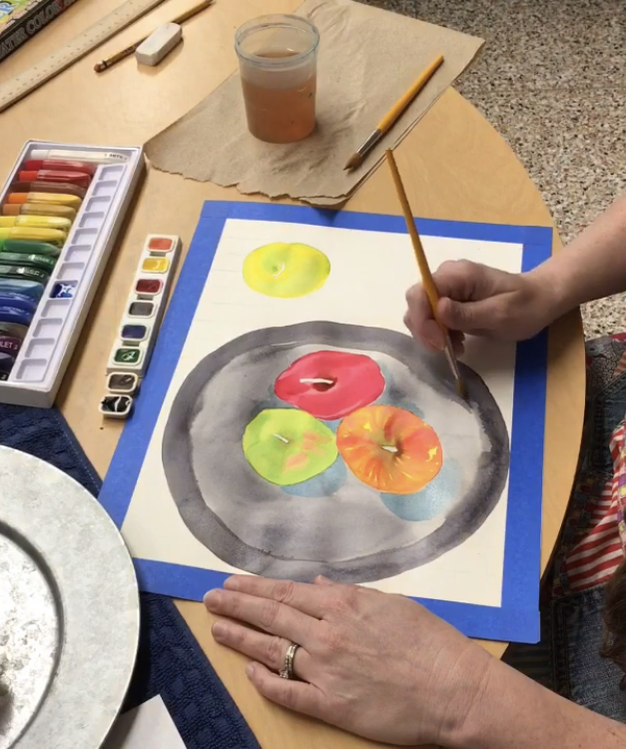
Primary Lesson inspired by "Apples" Henri Matisse, 1916
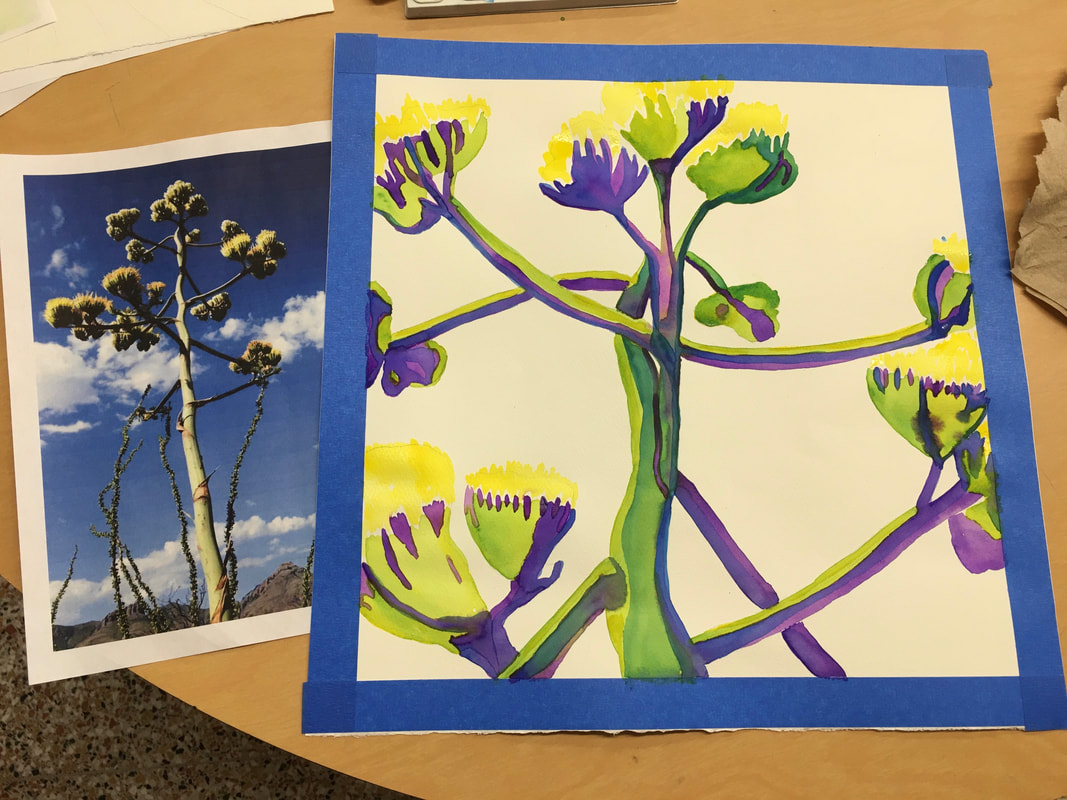
Intermediate Lesson inspired by artist Georgia O'Keeffe
INSTRUCTIONAL VIDEO
Introduction to Watercolor
Explore with semi-moist paints and water to add color to your drawings.
Primary Lesson inspired by "Apples" Henri Matisse, 1916
Intermediate Lesson inspired by artist Georgia O'Keeffe
INSTRUCTIONAL VIDEO
|
Primary Watercolor Lessons
Part 1: Primary Watercolor Mrs. Barlow demonstrates how to sketch the objects - plate and fruit - while practicing spacing and organic shapes. Begin to add and layer colors to your drawing INSTRUCTIONAL VIDEO Part 2: Primary Watercolor Mrs. Barlow demonstrates how to complete the background, add details to the apple stems, and correct excessive color blending/bleeding. INSTRUCTIONAL VIDEO |
|
Intermediate Watercolor Lessons
Part 1: Intermediate Watercolor This piece is inspired by Georgia O’Keeffe, who zoomed in close to look at pieces of a whole. When you look closely, the ordinary becomes extraordinary. You will choose a piece from nature – a flower, a leaf – and focus on the positive space to zoom in on color, shadows, and highlights. Sketch your object lightly, focusing on the contour lines and break your space into color shapes. Add color with your semi-moist paints and water – build detail and depth by layering and blending colors. In this abstraction piece not every detail will be represented, but rather it gives the idea of the object. INSTRUCTIONAL VIDEO Part 2: Intermediate Watercolor Add additional details and work in small areas to finish the background of the piece. INSTRUCTIONAL VIDEO |
Conclusion to Watercolor
Mrs. Barlow wraps up the watercolor lessons with a message about the projects created during the sessions.
INSTRUCTIONAL VIDEO
Mrs. Barlow wraps up the watercolor lessons with a message about the projects created during the sessions.
INSTRUCTIONAL VIDEO
COLLAGE
Introduction to Collage
Mrs. Barlow introduces the collage lessons – creating a piece of art with paper, scissors, and glue!
INSTRUCTIONAL VIDEO
Introduction to Collage
Mrs. Barlow introduces the collage lessons – creating a piece of art with paper, scissors, and glue!
INSTRUCTIONAL VIDEO
|
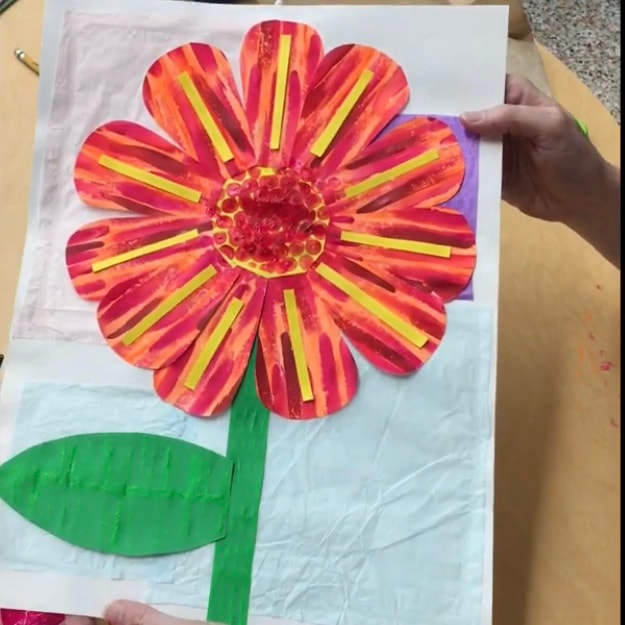
Primary Collage Lessons
Part 1: Primary Collage Mrs. Barlow gives examples and information on how collage artwork is created. The project develops motor skills by working with scissors and paper. The Primary Lesson is inspired by Eric Carle's "The Tiny Seed". Let's begin! Create the background, painted paper, and the stem and leaves of the flower. INSTRUCTIONAL VIDEO Part 2: Primary Collage Continue making your flower – printmaking on the stem, leaves, and pistil; cut out petals from the painted paper; layout your design; and glue your flower parts to the background paper. INSTRUCTIONAL VIDEO Words of Wisdom from Mrs. Barlow For your glue use just a dot, not a lot! |

|
Intermediate Collage Lessons
Part 1: Intermediate Collage The Secondary Lesson is inspired by Louis Ehlert and Day of the Dead. Mrs. Barlow gives examples and information on how collage artwork is created. Think about who you would like to honor in your collage. INSTRUCTIONAL VIDEO Part 2: Intermediate Collage Let's begin! In this lesson, Mrs. Barlow demonstrates how to sketch your ideas, create pieces of your collage, and assemble them. Have fun and enjoy the wide range of creative options with collage! Work with your paper and scissors to add details to your fond memory, Day of the Dead piece. INSTRUCTIONAL VIDEO Part 3: Intermediate Collage Finishing touches! Continue to build and add interesting details to the collage. Then glue your pieces down to create your beautiful, creative collage! INSTRUCTIONAL VIDEO |
Conclusion to Collage
Mrs. Barlow wraps up the collage lessons by discussing the projects created and the possibilities with collage.
INSTRUCTIONAL VIDEO
Mrs. Barlow wraps up the collage lessons by discussing the projects created and the possibilities with collage.
INSTRUCTIONAL VIDEO
CLAY
Introduction to Clay
Mrs. Barlow introduces the clay lessons and projects. Let's have a wonderful time exploring clay!
INSTRUCTIONAL VIDEO
Introduction to Clay
Mrs. Barlow introduces the clay lessons and projects. Let's have a wonderful time exploring clay!
INSTRUCTIONAL VIDEO
|
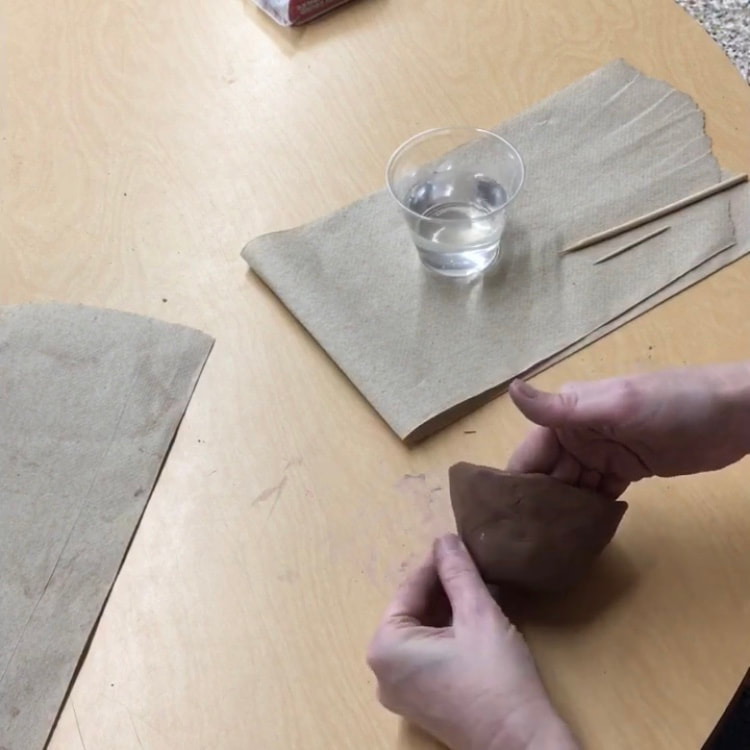
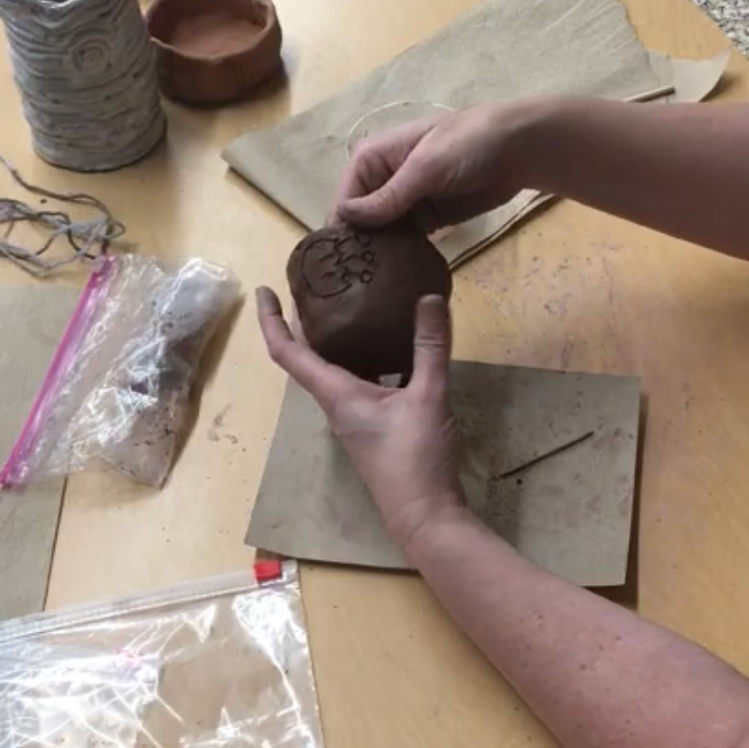
Primary Clay Lessons: Pinch Pot
Part 1: Primary Clay Mrs. Barlow discusses how clay is very versatile and can be seen around the world in different cultures and people groups. She shows examples of clay projects to demonstrate the variety of things that clay can be used to create. This lesson will focus on making a pinch pot. We begin with starting your form, a sphere. Then press your thumb in and continue to form the pot with your thumb and fingers. We finish up the lesson with planning and considering additional elements - design patterns, shape, and texture. Let the clay dry overnight in a plastic bag before beginning your design portion. ***ADVICE: If your little one is having difficulty forming the pinch pot, use a smaller amount of clay. You can try using half of the material given, which will allow them to form the clay better with small hands. INSTRUCTIONAL VIDEO Part 2: Primary Clay Let's add design! Sketch out your design ideas, then use a toothpick to add creative elements to your pinch pot. INSTRUCTIONAL VIDEO |
|
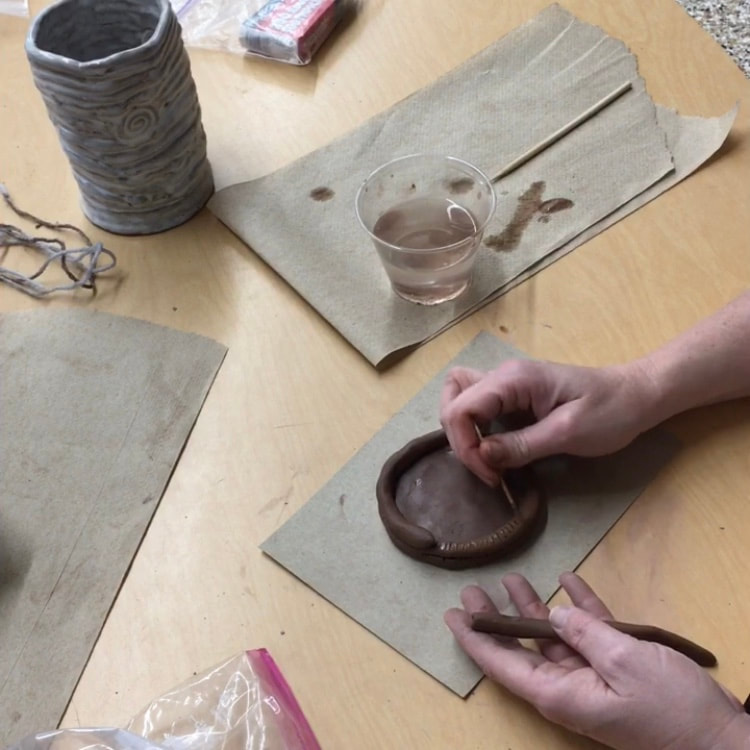
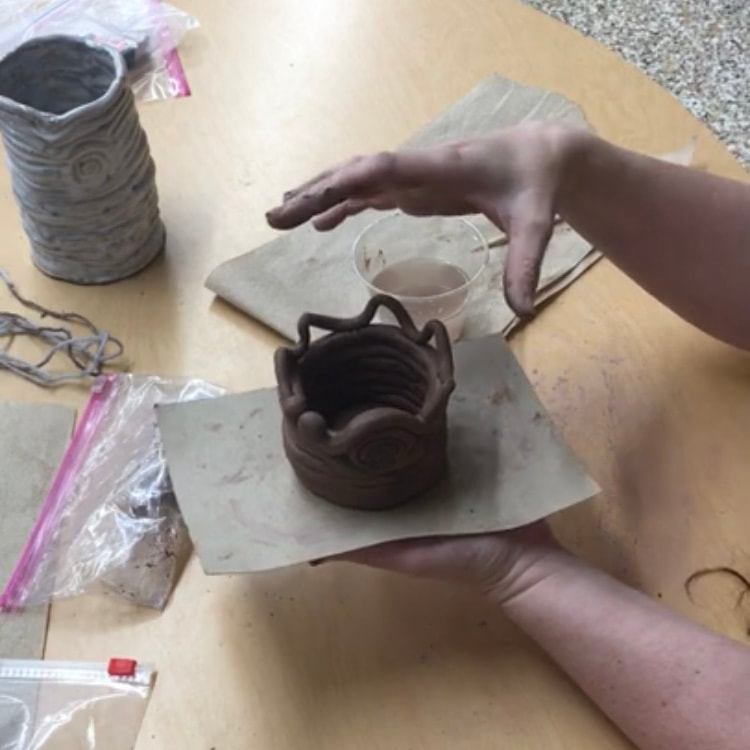
Intermediate Clay Lessons: Coil Pot
Part 1: Intermediate Clay Mrs. Barlow discusses how clay is very versatile - it stretches centuries, the world, cultures, and people groups. She shows examples of clay projects to demonstrate the wide variety of clay creations. This lesson will focus on making a coil pot. We begin by forming the base to the pot. Then we create the walls of the pot by rolling coil pieces and attach them with scoring and slip. INSTRUCTIONAL VIDEO Part 2: Intermediate Clay Let's add details! Mrs. Barlow demonstrates how to add decorative accents - swirls, spheres, and wavy lines - to your coil pot. You'll continue to build the walls and do finishing touches by smoothing the scoring and cracks. Then let your coil pot dry before the firing process. INSTRUCTIONAL VIDEO Part 3: Intermediate Clay Apply glazing after the firing process. INSTRUCTIONAL VIDEO COMING SOON! |
WOODEN ASSEMBLAGE SCULPTURE
Introduction to Wooden Assemblage Sculpture
Mrs. Barlow introduces the wooden assemblage lessons — explore and design using wood.
INSTRUCTIONAL VIDEO
Introduction to Wooden Assemblage Sculpture
Mrs. Barlow introduces the wooden assemblage lessons — explore and design using wood.
INSTRUCTIONAL VIDEO
|
Primary Wooden Assemblage Sculpture
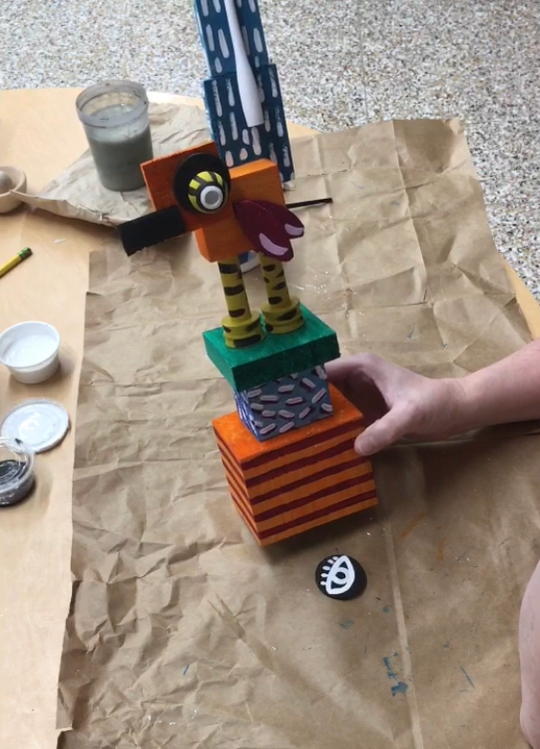
Part 1: Primary Wooden Assemblage The Primary Level lesson is inspired by Texas artist, Terrell Powell, whose art features real life objects with a fun perspective. This lesson will focus on creating the structure of a bird in the style of Terrell Powell. You will begin by sketching a plan for constructing your project. Then begin to play and arrange the wooden pieces to form a bird. This project introduces a new design element, balance. INSTRUCTIONAL VIDEO Part 2: Primary Wooden Assemblage Let's paint our pieces! Add fun colors and repeating shapes and lines. You'll start with a base coat then add fun details. INSTRUCTIONAL VIDEO Part 3: Primary Wooden Assemblage It's time to glue it together! Build and glue your sculpture and add finishing details. INSTRUCTIONAL VIDEO |
|
Intermediate Wooden Assemblage Sculpture
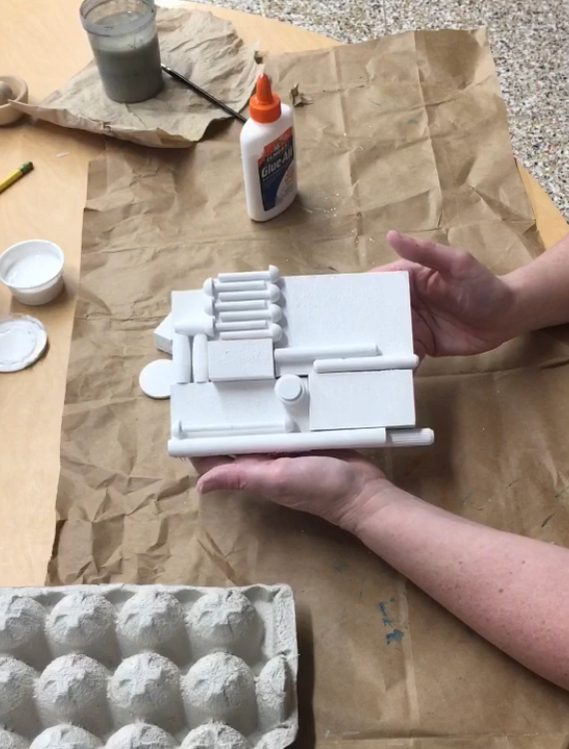
Part 1: Intermediate Wooden Assemblage The Intermediate Level lesson is inspired by the wooden relief art of Louise Nevelson. Move, arrange, and explore with your wooden pieces. You will create a visually interesting design using the different pieces of wood in the style of Louise Nevelson. Focus on balance, texture, variety, and patterns. INSTRUCTIONAL VIDEO Part 2: Intermediate Wooden Assemblage Let's paint our pieces! You'll add a color to your wooden pieces for a monochromatic effect that brings out the patterns and shadows in your sculpture. INSTRUCTIONAL VIDEO Part 3: Intermediate Wooden Assemblage Now that the paint has dried, you'll begin assembling your sculpture! INSTRUCTIONAL VIDEO |